

Photo by Moritz Kindler on Unsplash
Deep Dive into Ngrok with VMs and Multi-Tunneling for Backend and Frontend


Greetings, fellow tech enthusiasts! Today, we're embarking on a journey through the fascinating world of Ngrok, VMs, and multi-tunneling. As a seasoned DevOps engineer, I'm excited to share with you a comprehensive guide on setting up Ngrok to securely expose our backend and frontend applications from virtual machines to the outside world.
Prerequisites
Before we begin, ensure you have the following:
Virtual machine (VM) with your backend and frontend applications set up. (I am running my front-end and back-end in containers).
Ngrok account (free tier), create one from here https://ngrok.com/
Terminal or command-line interface on your VMs.
Basic understanding of networking concepts.
Installation and Configuration
Install Ngrok: Log into your VM and download Linux for Ngrok from the official website.
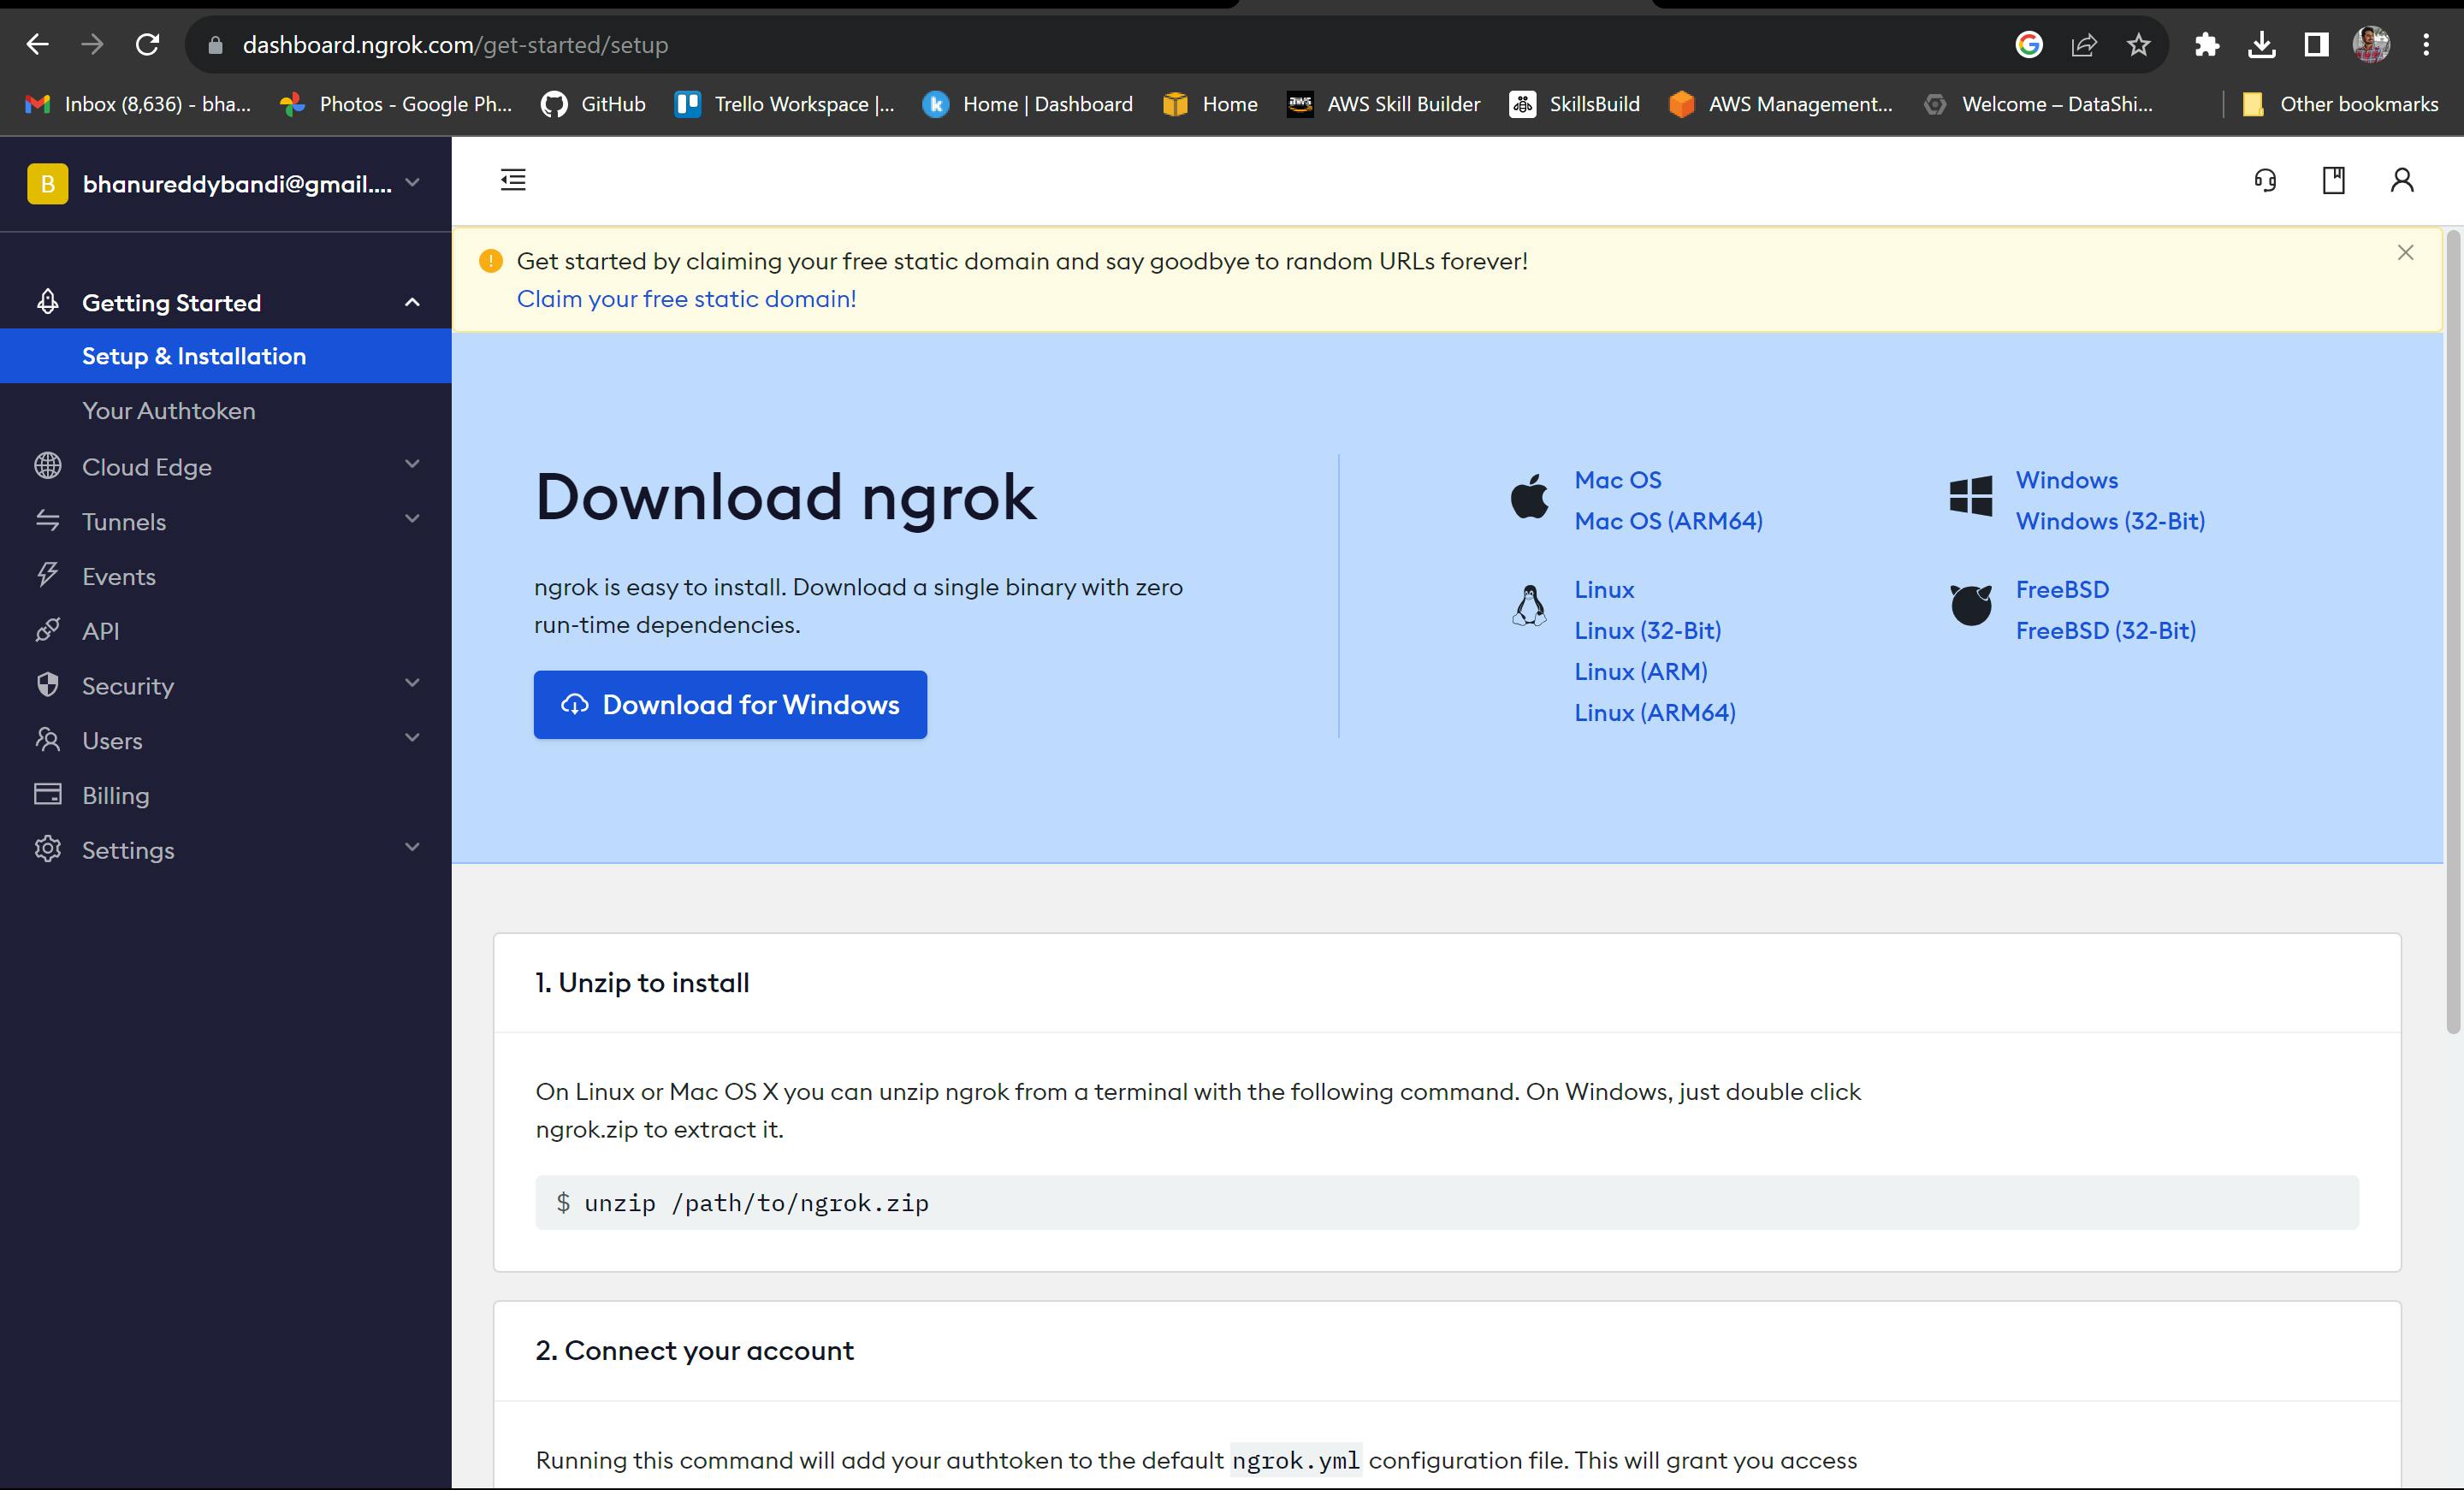
using SCP command copy the downloaded tgz file into VM.(I am moving it into /home/bhanu/Downloads diirectory )

Extract the Ngrok Archive: Use the
tarcommand to extract the Ngrok binary from the archive:tar -xzvf ngrok-v3-stable-linux-amd64.tgz
Authentication: In your Ngrok dashboard, find your authentication token.
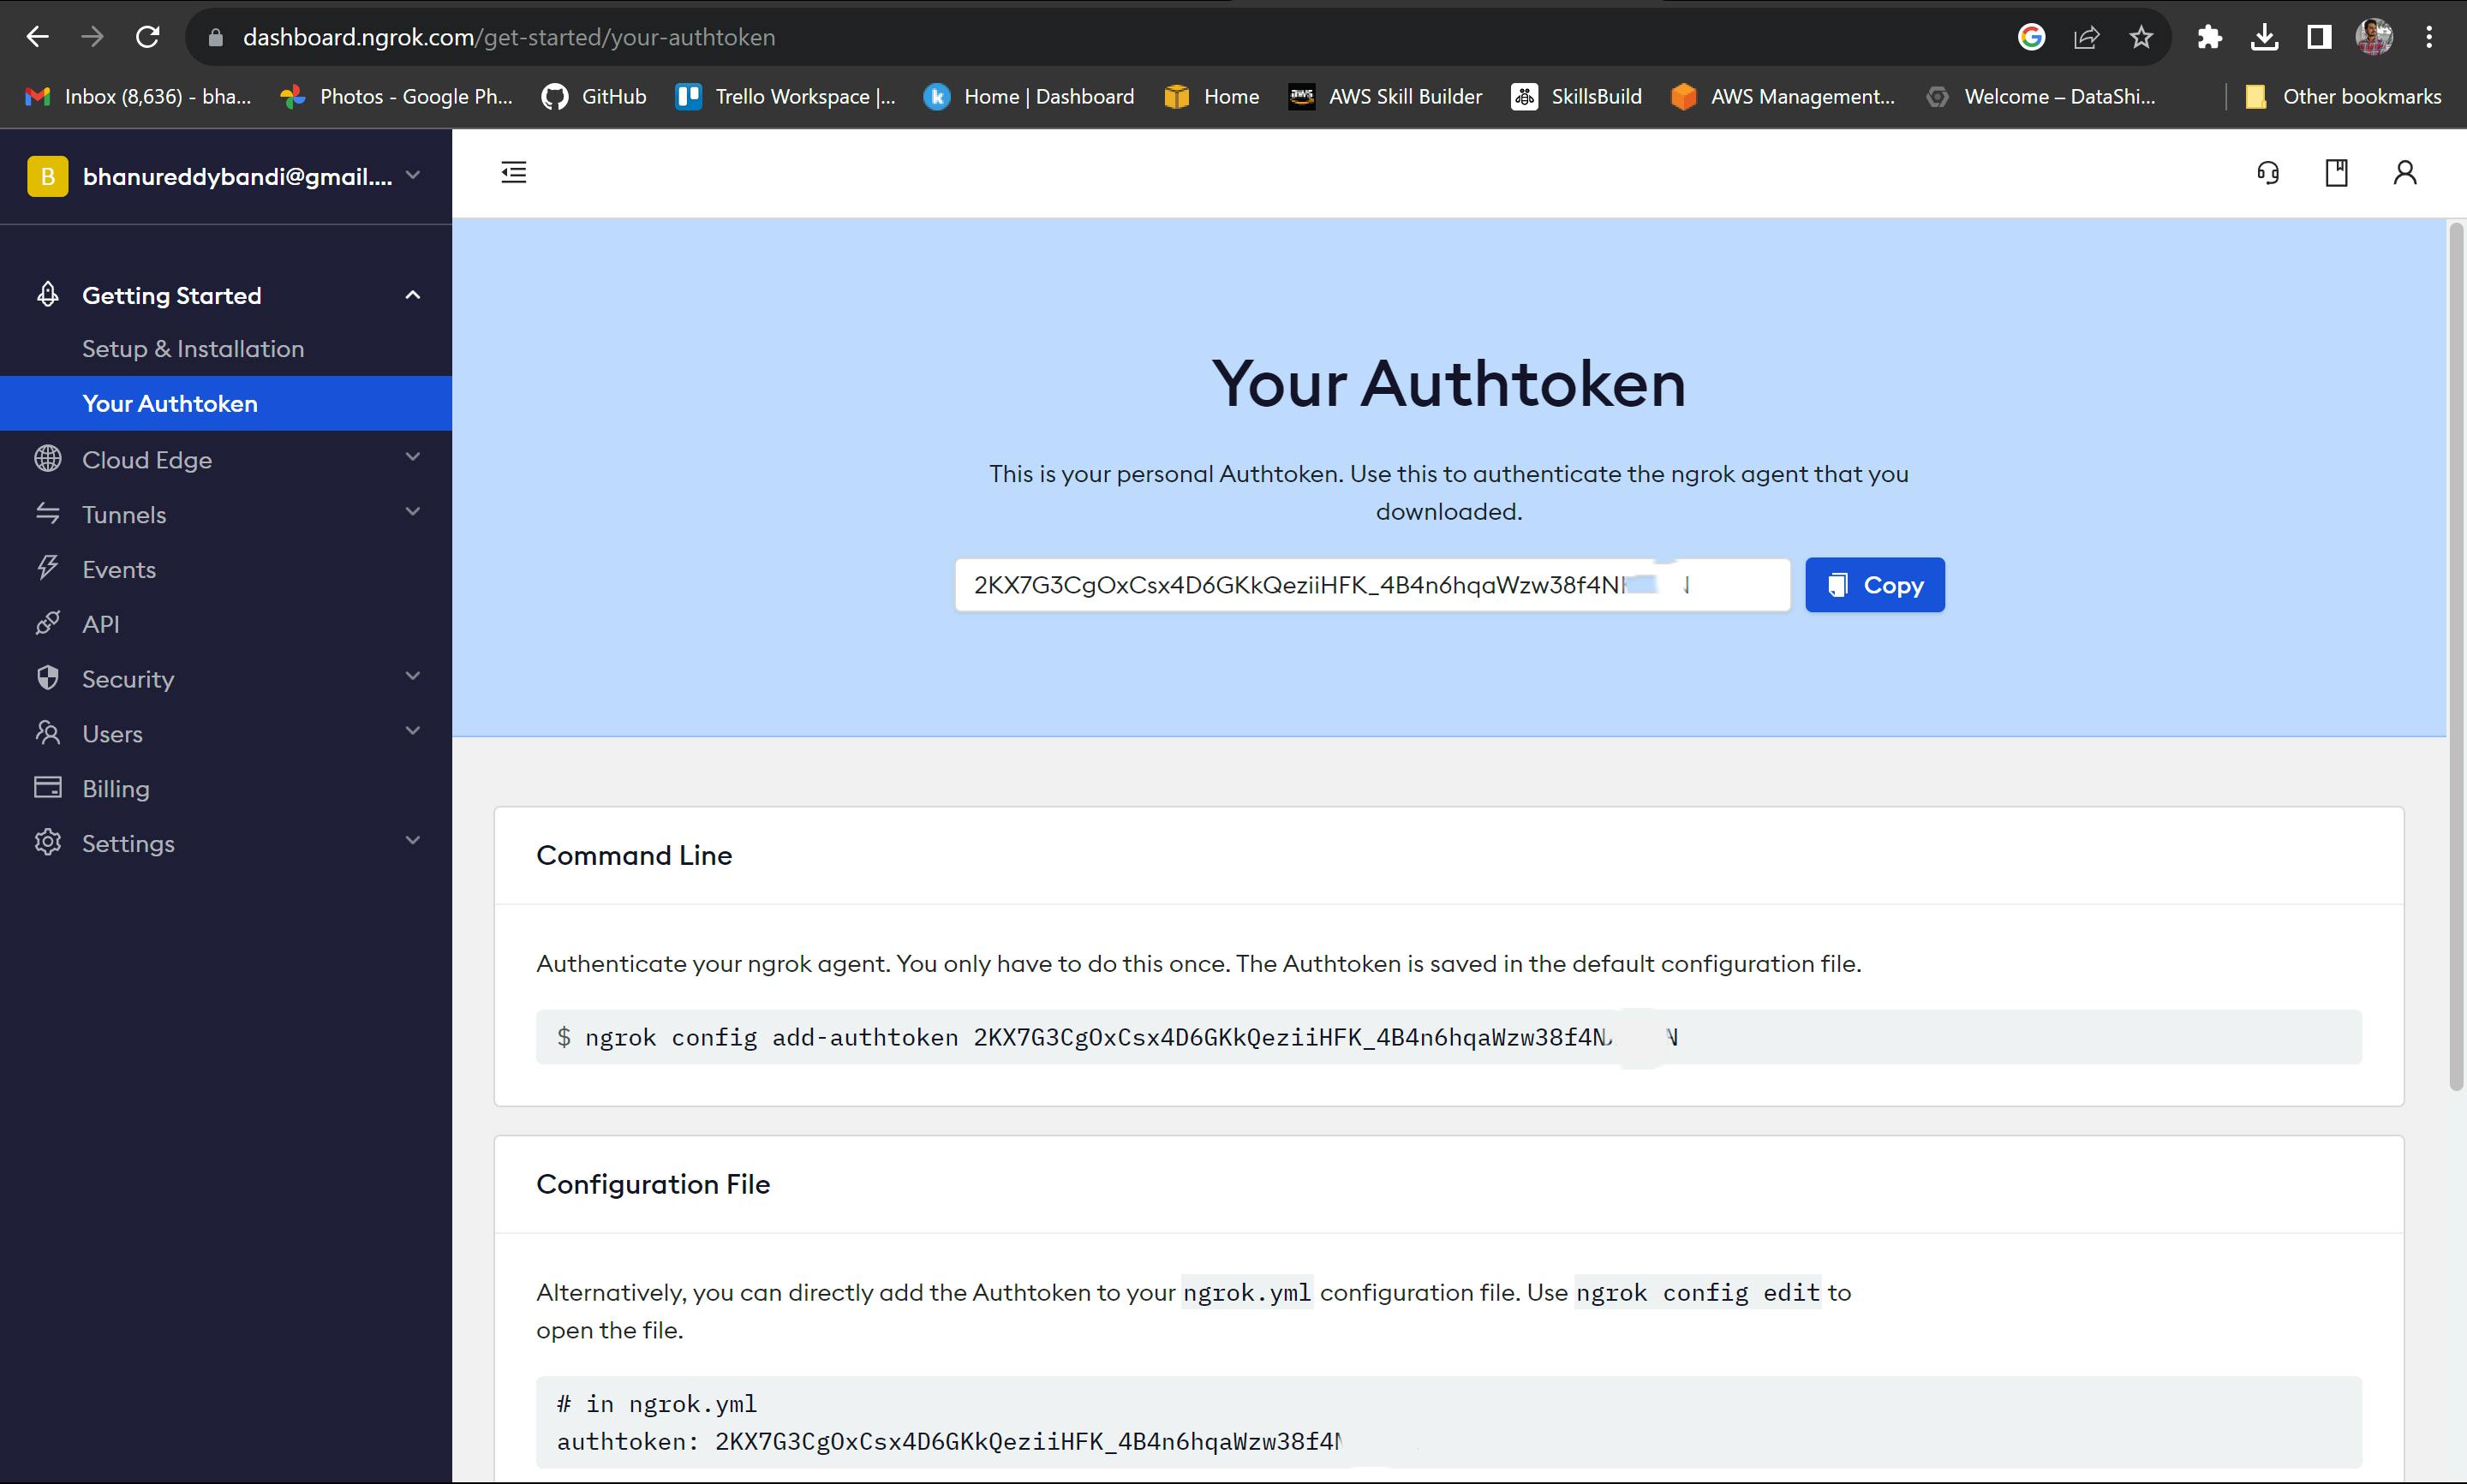
In your VM's terminal, authenticate Ngrok by running:
./ngrok authtoken (YOUR_AUTH_TOKEN)
Setting up the backend tunnel
Backend Application: Ensure your backend application is running on a specific port (e.g., 8081).
Create a tunnel: Open a terminal on your VM and run the following command to create a tunnel for your backend:
bashCopy code
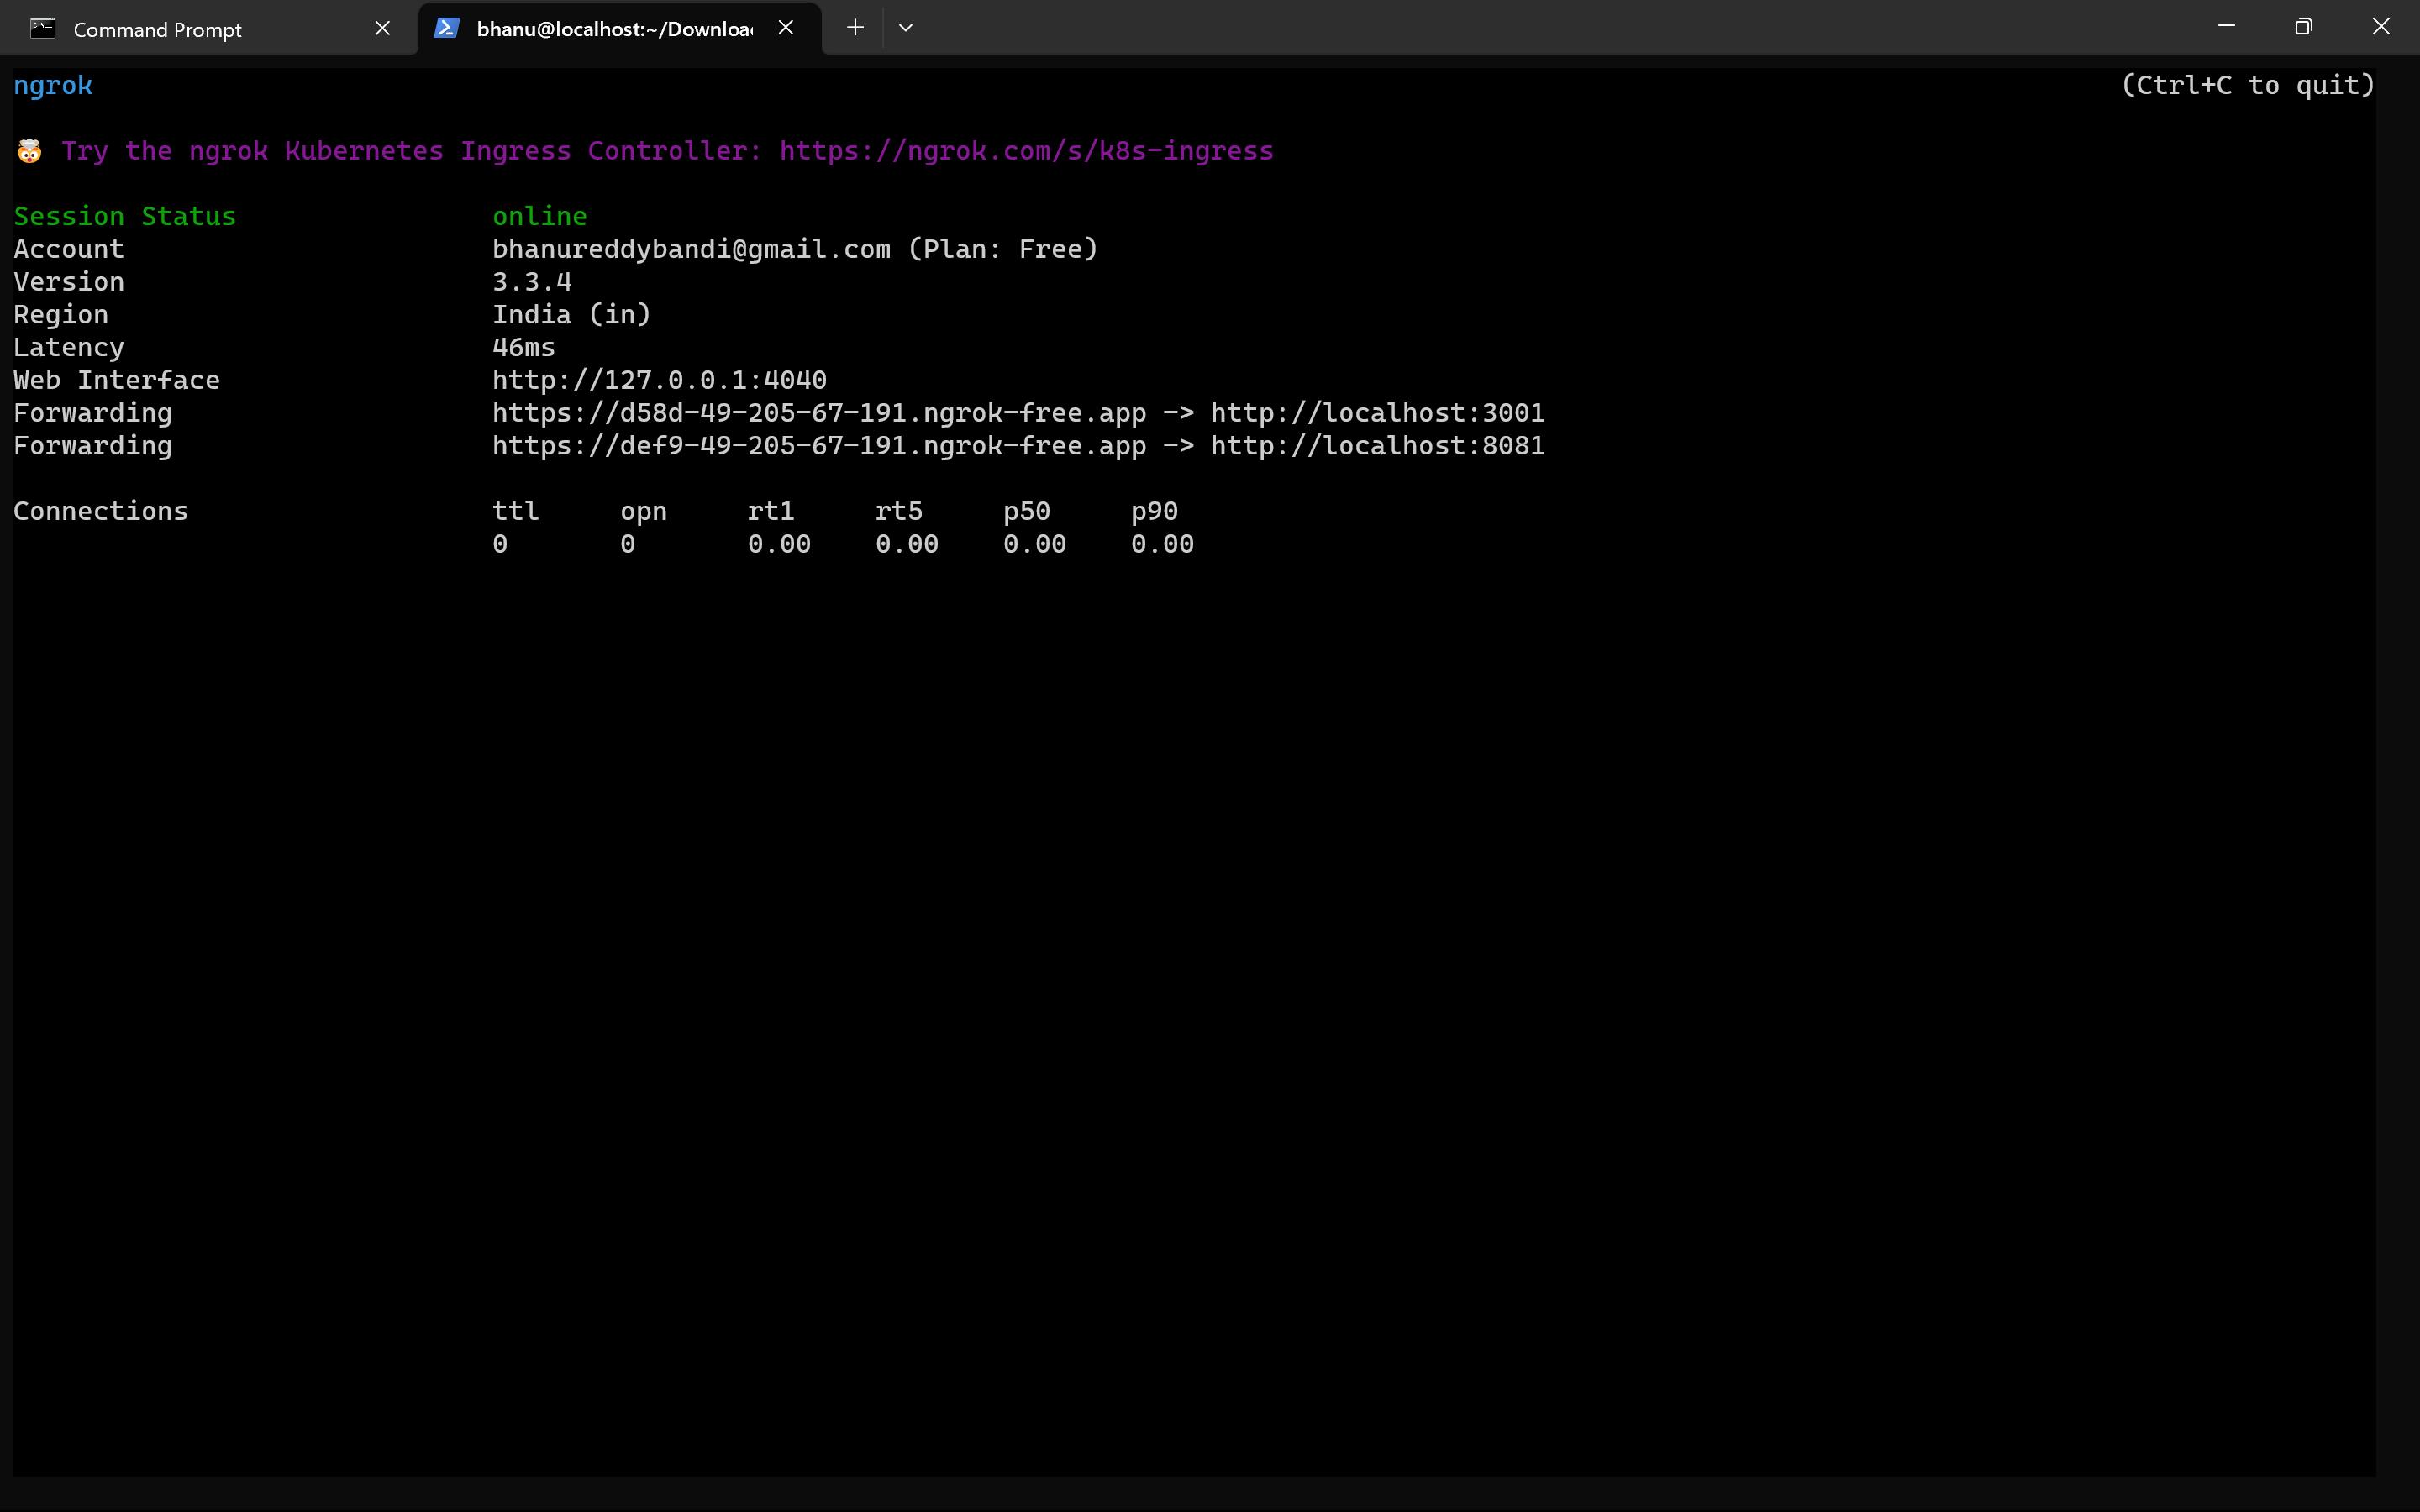
./ngrok http 8081Accessing the Tunnel: Ngrok will provide a temporary public URL (e.g.,
https://randomstring.ngrok.io). This URL is accessible externally and securely forwards traffic to your backend.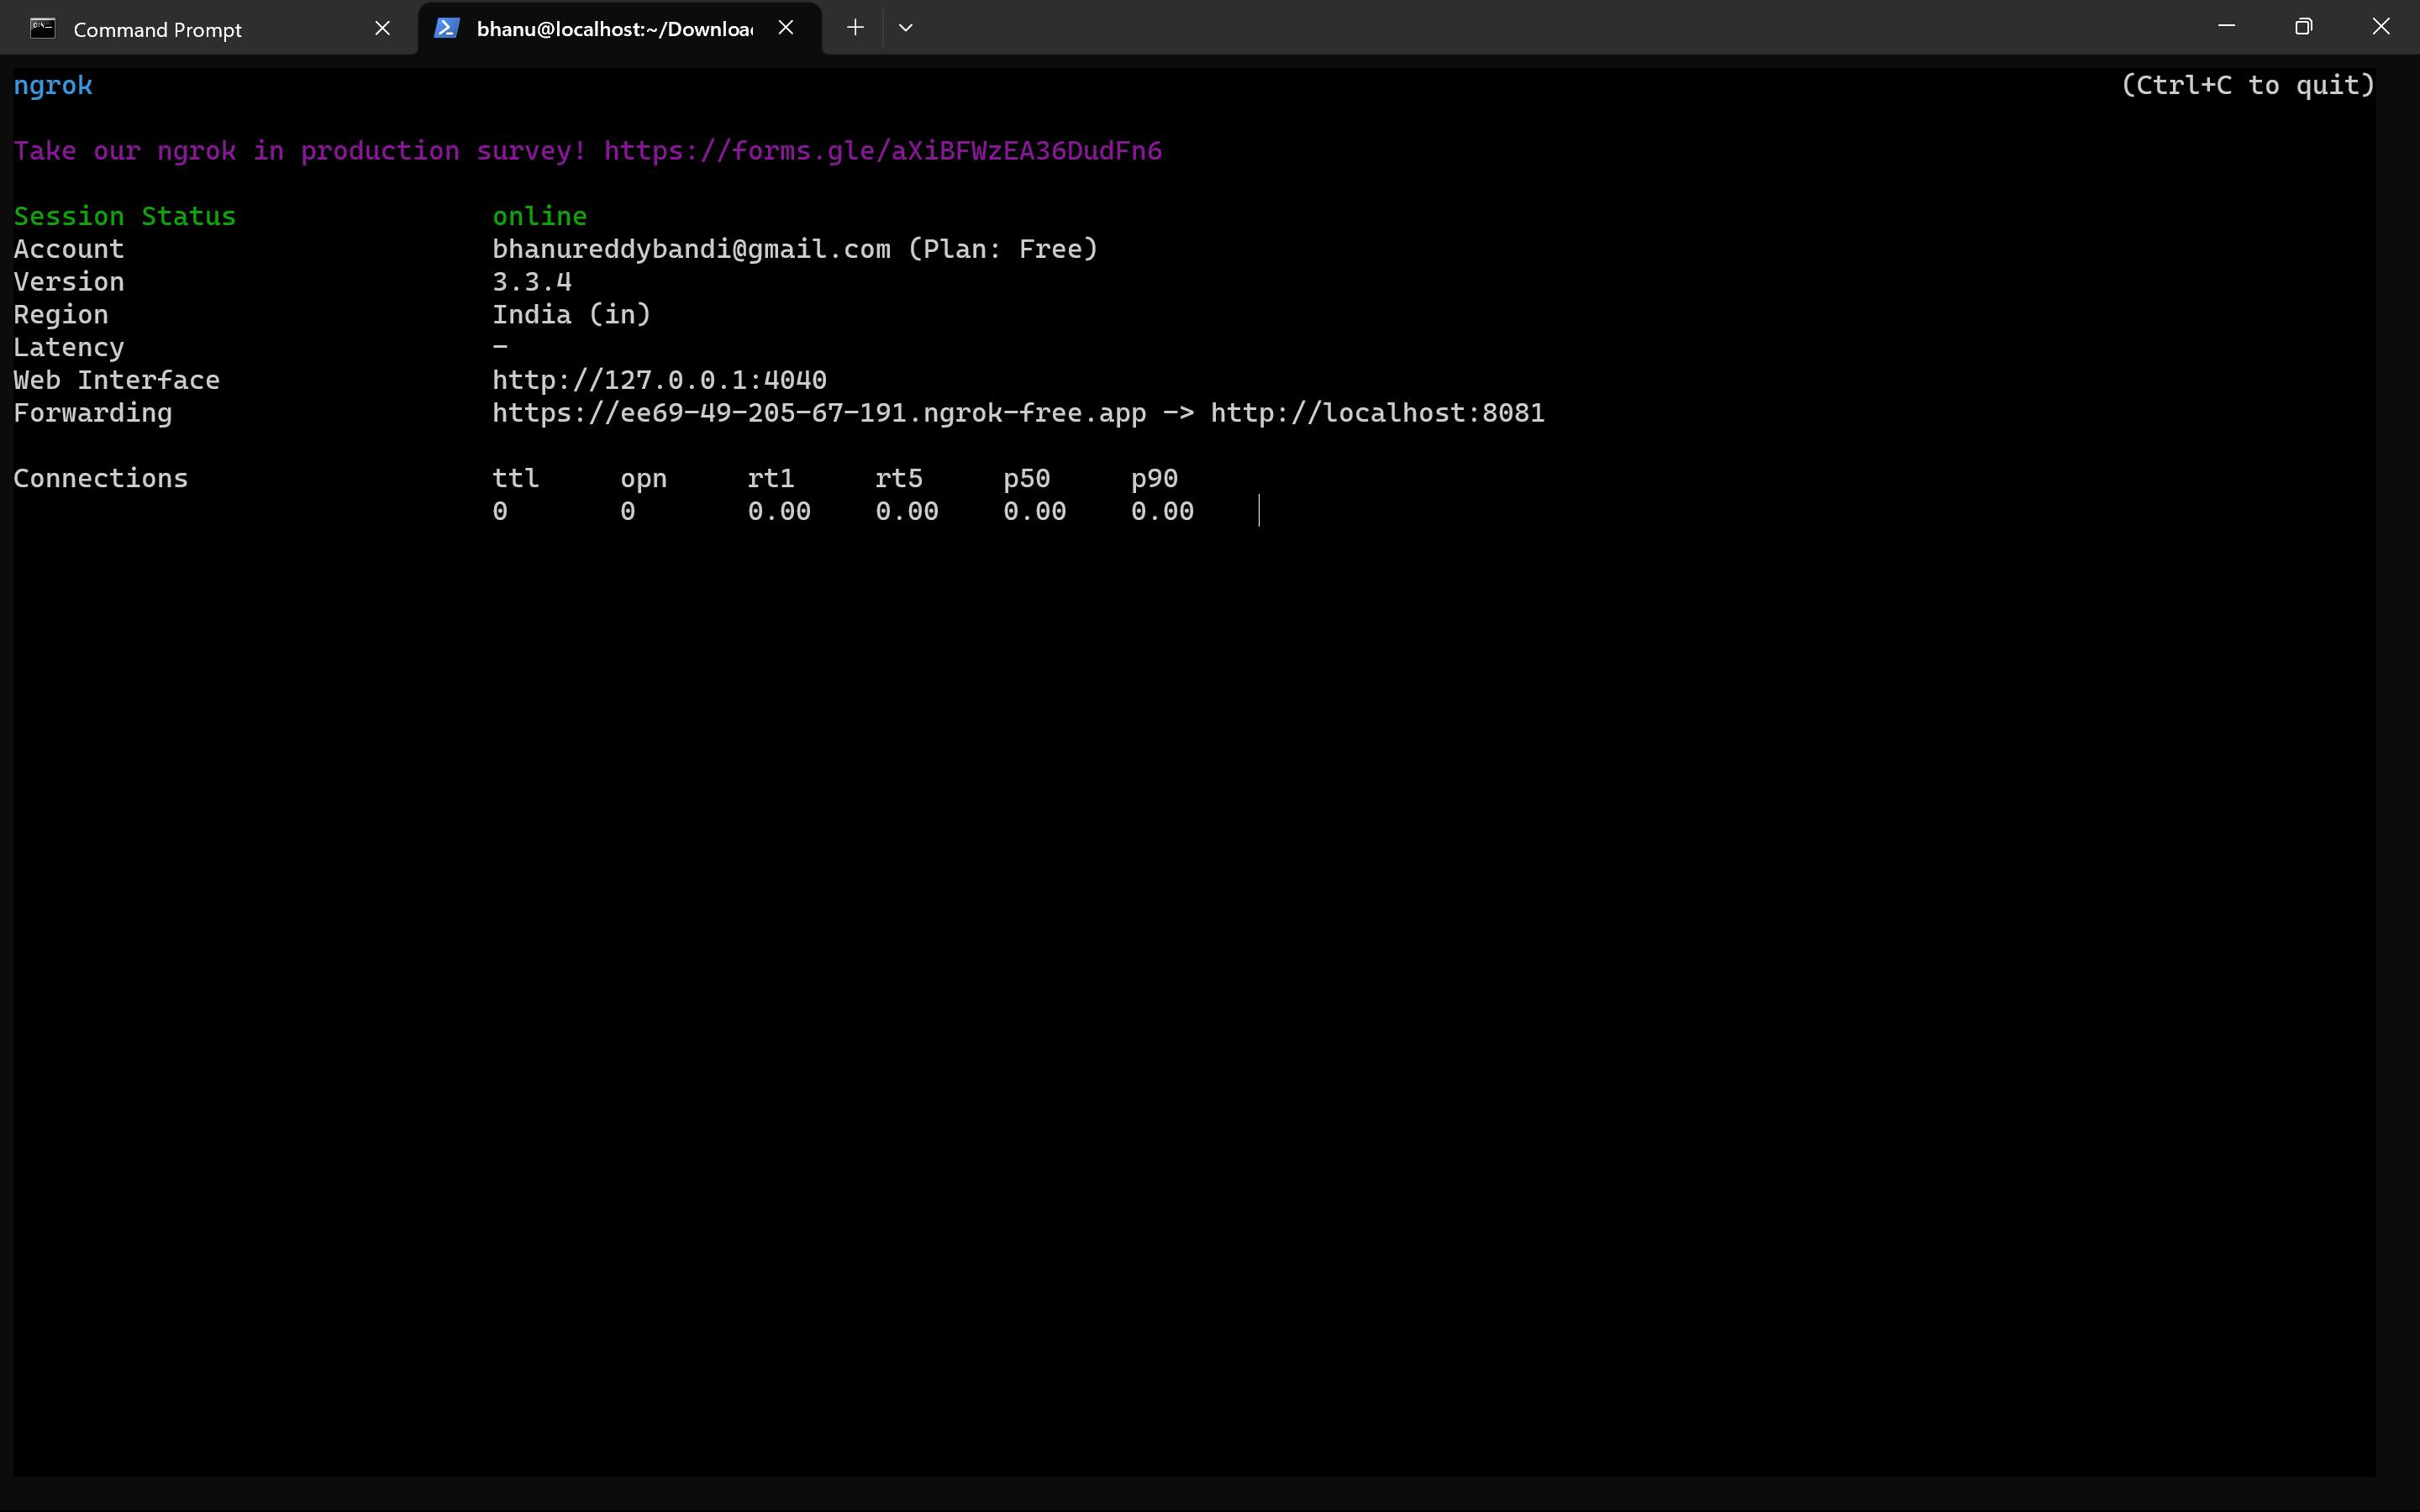
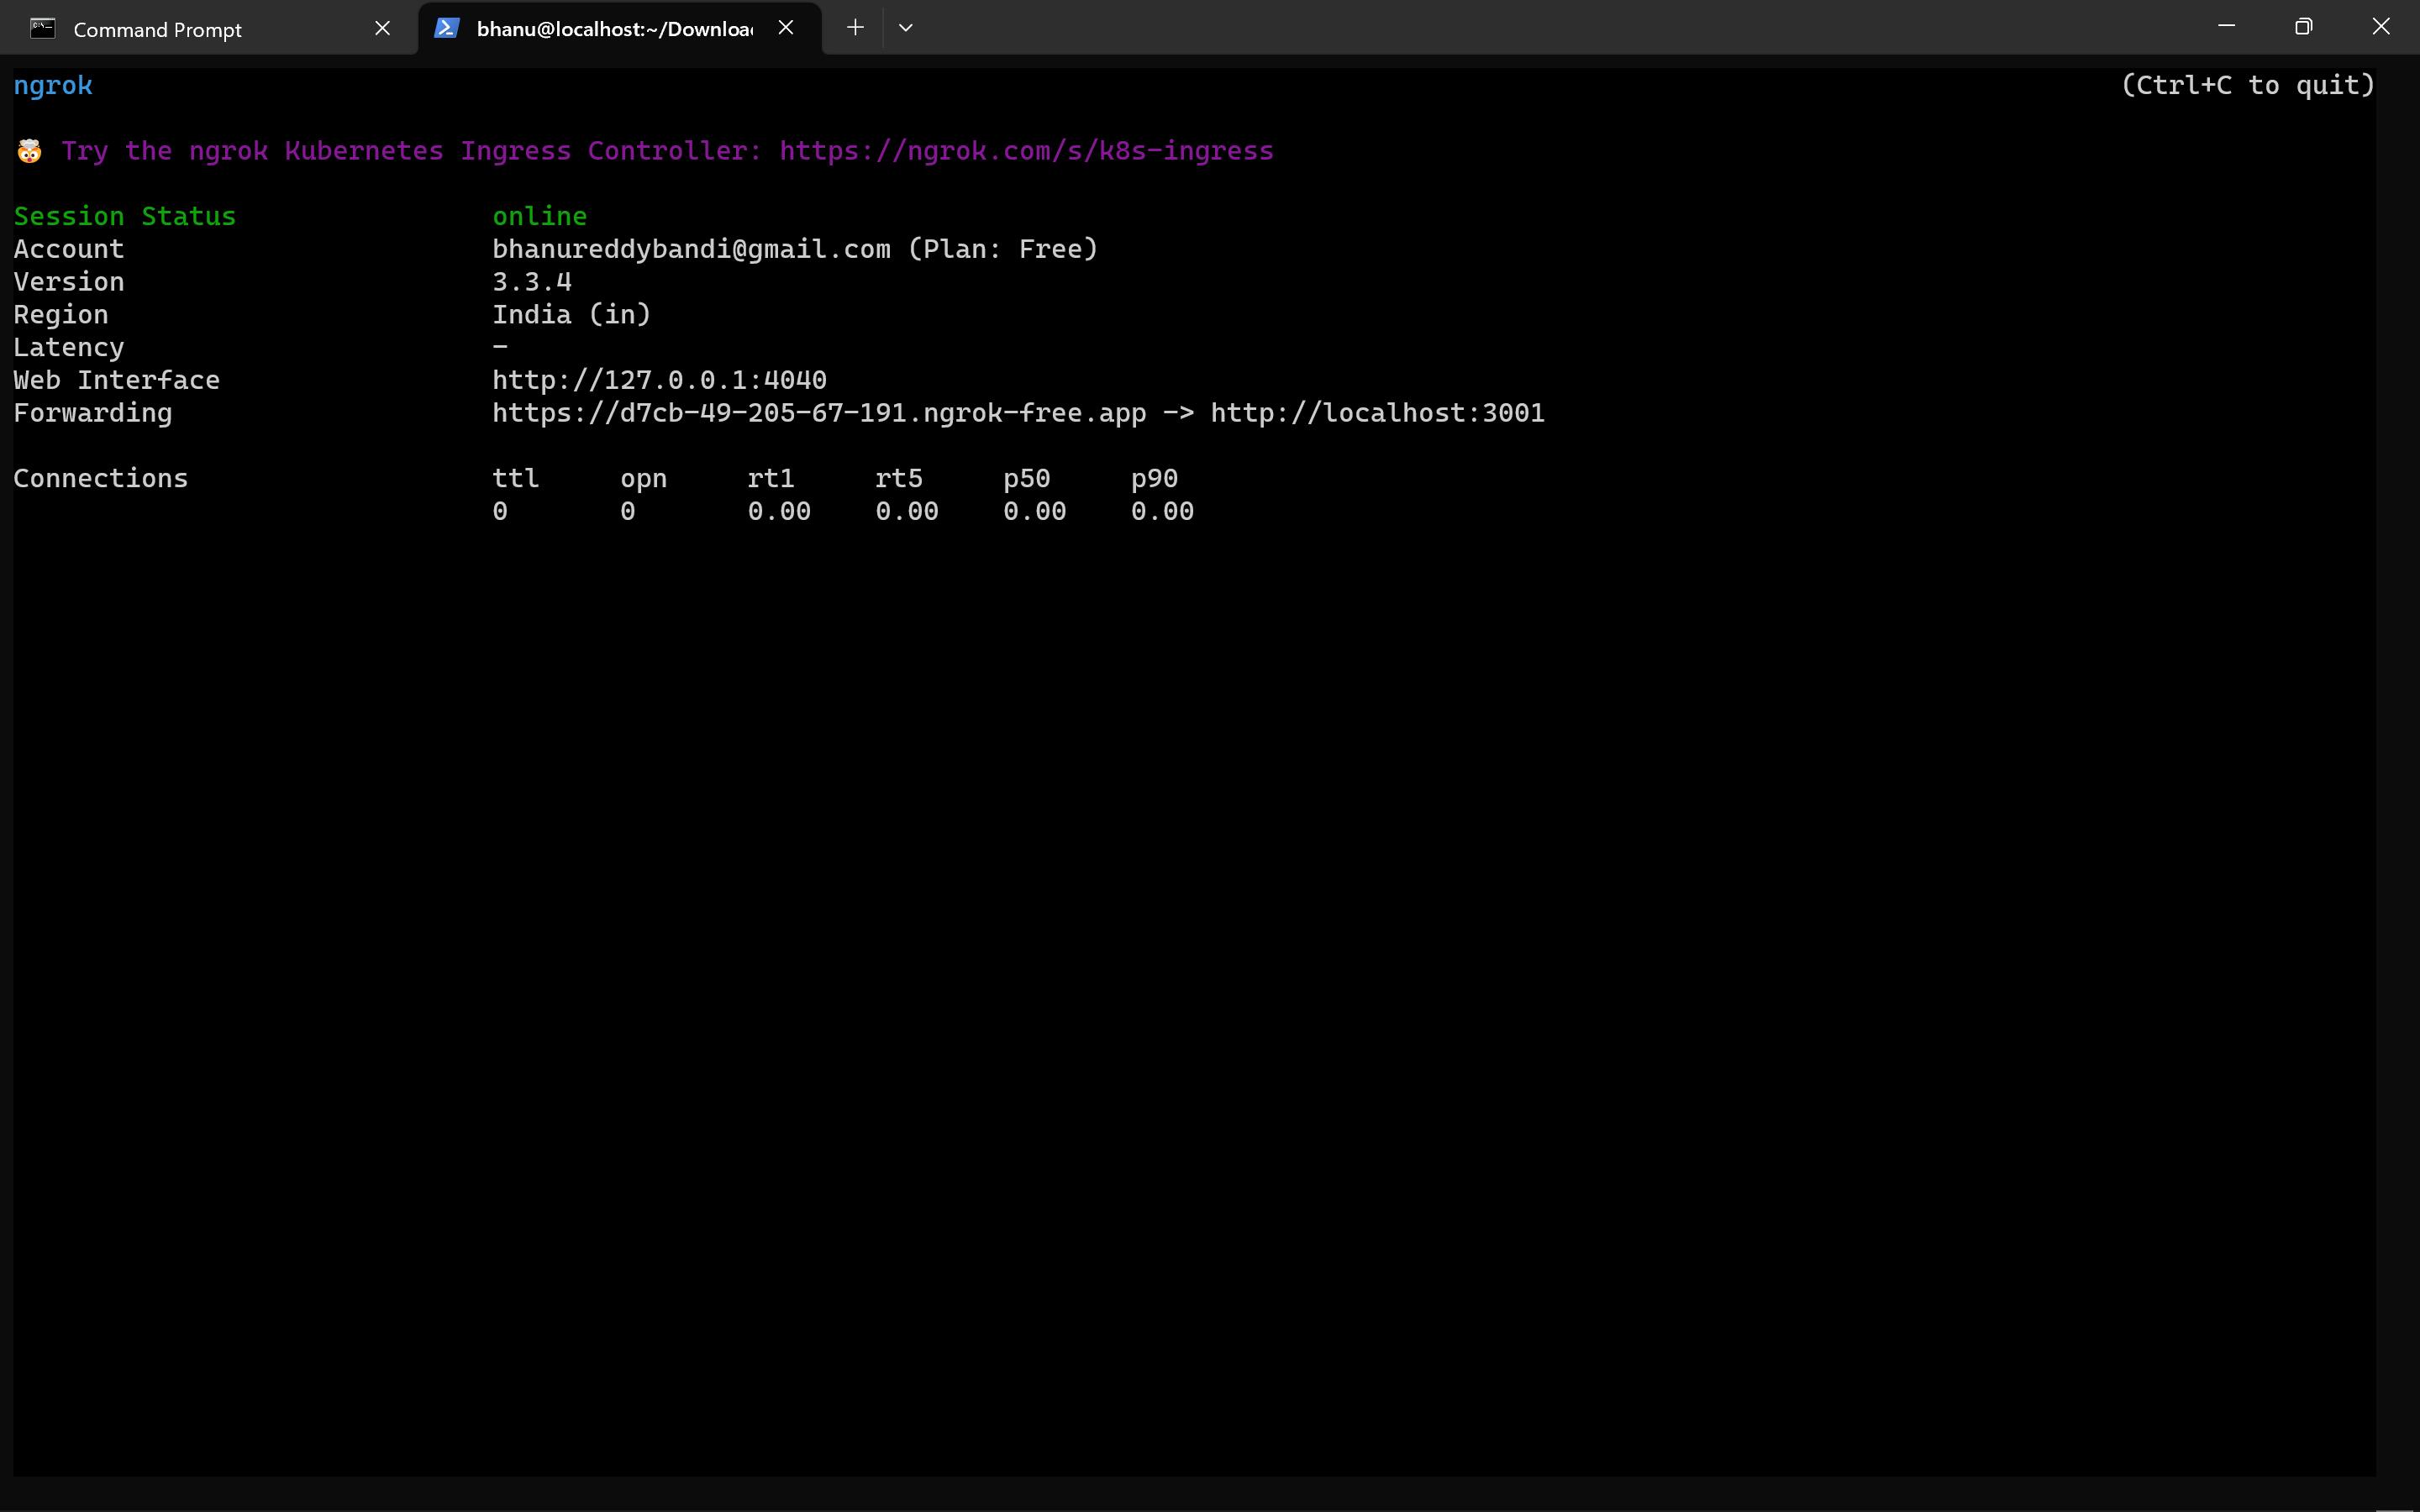
Setting up the frontend tunnel
Frontend Application: Confirm that your frontend application is up and running on a designated port (e.g., 3001).
Create another tunnel: Open a new terminal on your VM and run the following command to create a tunnel for your frontend:
bashCopy code
./ngrok http 3001Accessing the Tunnel: Similar to the backend, Ngrok will generate a public URL for your frontend application.
Multi-Tunneling
With Ngrok, you can create multiple tunnels to expose different services simultaneously using ngrok configuration file . This is extremely handy when dealing with microservices or multi-tier applications.
create a yaml file and configure to expose multiple tunnels at once.
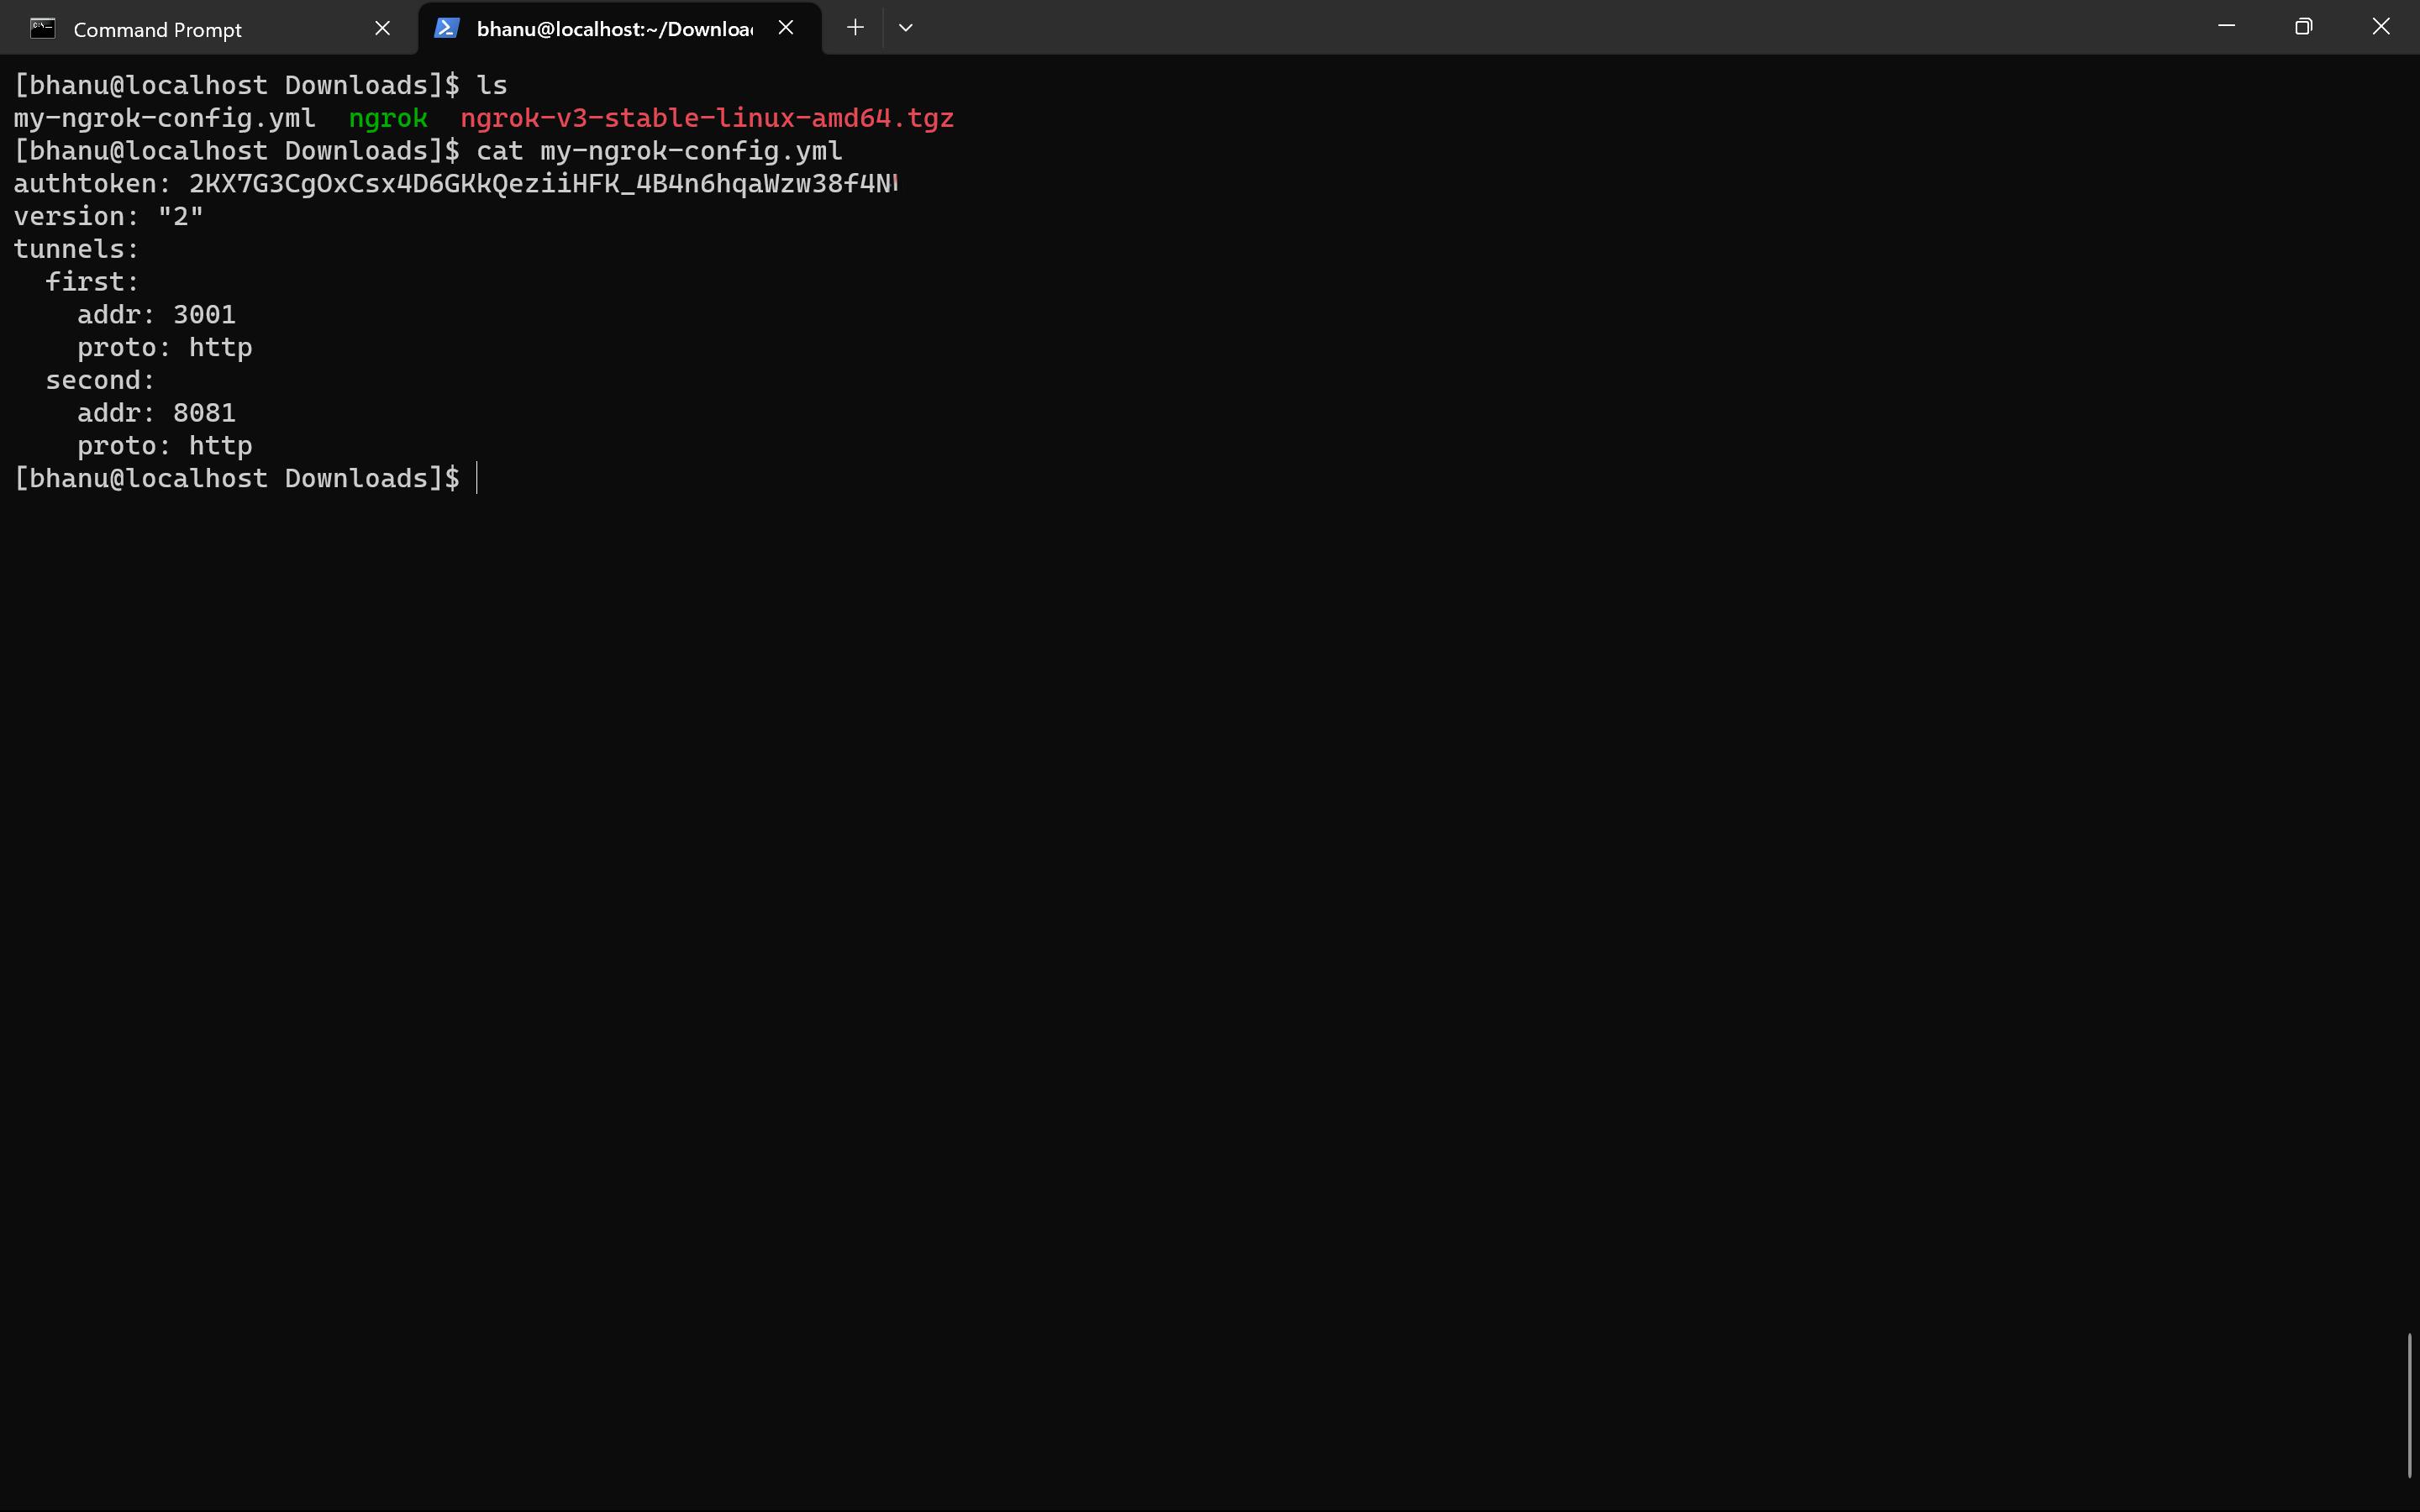
run the config file using
./ngrok start --all --config=my-ngrok-config.ymlfrom where the ngrok is extracted.
Displaying the frontend
Access Frontend: With both tunnels up and running, you can access your frontend through its Ngrok URL (e.g.,
https://randomstring.ngrok.io).CORS Configuration: Remember to configure your backend to allow requests from the Ngrok frontend URL if they are on different domains.
Wrapping Up
Congratulations! You've successfully set up Ngrok to securely expose your backend and frontend applications to virtual machines. This enables you to share your work with teammates, clients, and stakeholders without the hassle of complex networking configurations.
Remember, while Ngrok is a fantastic tool for development and testing, consider the security implications before deploying it in production. Always prioritize best practices to safeguard your applications and data.
Thank you for joining me on this deep dive into Ngrok and multi-tunneling. Happy coding, and may your applications shine both in the backend and frontend realms!